PacketCache
PacketCache is a free Windows service designed to continuously monitor the network interfaces of a computer and store the captured packets in memory (RAM). The idea is to make full-content packets available for post-event incident response and network forensic analysis. PacketCache can be used either as a complement to solutions for centralized network packet capturing, or without any other network monitoring solution in place.
Download PacketCache
3 good reasons to run PacketCache
- PacketCache captures network traffic on all network interfaces of a PC, not just the one connected to the corporate network.
- PacketCache allows incident responders to go back in time when a security breach is discovered.
- No WinPcap or NDIS drivers are needed to sniff traffic with PacketCache.
How PacketCache works
By default PacketCache reserves 1% of a computer's total physical memory for storing packets. A computer with 4 GB of RAM will thereby allow up to 40 MB of packets to be kept in memory. This might not seem like much, but PacketCache relies on a clever technique that allows it to store only the most important packets. With this technique just 40 MB of storage can be enough to store several days worth of “important” packets.
The “clever technique” we refer to is actually a simple way of removing packets from TCP and UDP sessions as they get older. This way recent communication can be retained in full, while older data us truncated at the end (i.e. only the last packets are removed from a session).
| Product name: | PacketCache |
|---|---|
| Latest version: | 0.9.3.0 |
| Download URL: | https://www.netresec.com/?download=PacketCache |
| SHA256: | 76523F569D2B12FA3B68453387F9896C65AA0511AE7D82C50C31FF2341879DF7 |
| SHA1: | 00890E483F3058D487CF2B4DC40BE08440798538" |
| Signed by: | Netresec AB |
Installation
Follow these steps to install PacketCache:
-
Download PacketCache.exe
and store it anywhere you wish. In our example we'll store it in:
C:\Program Files\PacketCache\ - Start cmd.exe as administrator (shift + right-click, select “Run as administrator”)
-
Register PacketCache as a local windows service with:sc create PacketCache binPath= "C:\Program Files\PacketCache\PacketCache.exe" start= auto
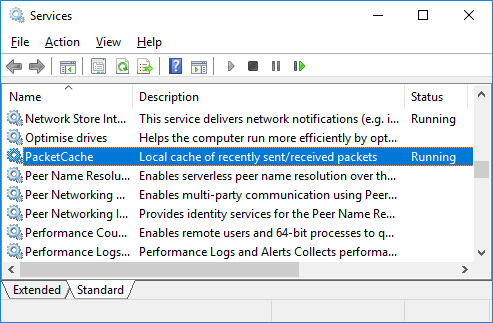
- Start the PacketCache service with “sc start PacketCache”, or by clicking “Start Service” in services.msc, or simply by rebooting the computer.
Reading packets captured by PacketCache
The easiest way to read packets from PacketCache is by using CapLoader:
- Start CapLoader version 1.4.1 (or later)
- Click: File > Read from PacketCache
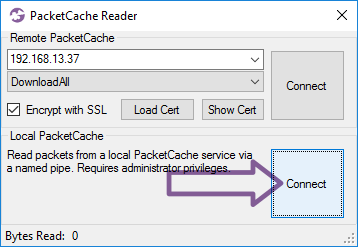
- Click the “Connect” button in the section called “Local PacketCache”
Reading PacketCache with PowerShell
Alternatively, here's a simple PowerShell script that can be used to read packets from PacketCache:
$epoch = Get-Date -UFormat %s -Millisecond 0;
$file = [System.IO.File]::OpenWrite('PacketCache-' + $epoch + '.pcap');
Write-Host "Writing packets to $file.Name";
try {
$pipeStream.Connect(1000);
$buffer = new-object byte[] 4096;
$n = $pipeStream.Read($buffer, 0, $buffer.Length);
while ($n -gt 0) {
$file.Write($buffer, 0, $n);
$n = $pipeStream.Read($buffer, 0, $buffer.Length);
}
}
finally {
$file.Close();
$pipeStream.Dispose();
}
However, if you get a PowerShell error message saying something like this:
https:/go.microsoft.com/fwlink/?LinkID=135170.
At line:1 char:1
+ .\ReadPacketCache.ps1
+ ~~~~~~~~~~~~~~~~~~~~~
+ CategoryInfo : SecurityError: (:) [], PSSecurityException
+ FullyQualifiedErrorId : UnauthorizedAccess
Then you need to change the execution policy to RemoteSigned before running the PowerShell script.
Also, please note that PacketCache only provides data to users with local admin privileges, so you will have to run the PowerShell script as administrator in order to read the captured packets.
Reading a remote PacketCache with WinRM / PowerShell Remoting
Packets can also be read from a PacketCache running on a remote host by using PowerShell Remoting (WinRM).
To do so we recommend using our ReadRemotePacketCache.ps1 script like this:
[*] Dumping PacketCache at DESKTOP-LT4711
[*] Copying PCAP dump from DESKTOP-LT4711
[*] Remote PacketCache data saved to DESKTOP-LT4711_181112_1337.pcap
For more details on how to read from a remote PacketCache using PowerShell remoting, please see our blog post "Remote Packet Dumps from PacketCache".
Download ReadRemotePacketCache.ps1
Reading PacketCache with Wireshark
It is also possible to read packets from PacketCache directly from Wireshark (version 2.3 or later required). Please read our blog post "Reading cached packets with Wireshark" for an in-detail description, or follow these steps:
- Start Wireshark with admin rights (right-click > “Run as administrator”)
- Click: Capture > Options
- Click “Manage Interfaces...”
- Select the “Pipes” tab
- Click the “+” button to add a named pipe
- Name the pipe “\\.\pipe\PacketCache” and press ENTER to save it
- Click “OK” in the Manage Interface window.
- Click “Start” to read the packets from PacketCache
Benefits/Pros

- No privacy issues regarding central storage of captured network traffic – each computer is responsible for storing only the packets it sends/receives.
- All IPv4 interfaces are monitored, not just the one connected to the corporate network. This way traffic will be captured even on public WiFi networks and Internet connections provided through USB broadband modems (3G/4G).
- No need to scale up the monitoring solution as the number of hosts increase on the network – the total capturing capacity will be proportional to the number of hosts by design.
- Traffic is being monitored at lots of locations in your network, not just at one central location. You will even be able to capture packets that never leave the local subnet.
- PacketCache can be easily deployed on servers and clients across a corporate network without any need for expensive hardware or network topology modifications.
- PacketCache does NOT require any additional software or drivers (such as WinPcap or NDIS) to be installed.
Limitations
- PacketCache does not support IPv6 packets, only IPv4.
- PacketCache can't capture outgoing packets on Windows Vista, but works just fine in later operating systems (Win 7, Win 10 etc).
- Requires .NET Framework 4.0
- Reading captured packets from a host requires local administrator privileges (this is actually by design for security/privacy reasons).
- Captured file transfers are often truncated due to the limited memory space used by PacketCache.
Frequently Asked Questions (FAQ)
Q: If packets are stored in RAM, will all historical traffic be lost when my computer is rebooted?
A: No, PacketCache is designed to dump the packets from RAM into an encrypted file upon reboot. This file will then be read back into RAM when the computer boots up again.
Q: Is it possible to allocate more than 1% of my memory for PacketCache?
A: Yes, when registering PacketCache.exe with sc, simply append a number as an argument to the PacketCache command. For example, in order to allow up to 5% of RAM to be used, register the PacketCache service like this:
Q: Is PacketCache free? Can I use this software commercially?
A: Yes, and yes. PacketCache is released under a Creative Commons Attribution-NoDerivatives 4.0 International License,
which means that you can copy and redistribute PacketCache in any medium or format for any purpose,
even commercially.
Please feel free to contact us if you have any additional questions regarding PacketCache!
⚙