
Latrodectus BackConnect

This blog post demonstrates how artifacts, such as reverse shell commands and VNC session screenshots, can be extracted from Latrodectus BackConnect C2 traffic with NetworkMiner.
I recently learned that the great folks from The DFIR Report have done a writeup covering the Latrodectus backdoor. Their report is titled From a Single Click: How Lunar Spider Enabled a Near Two-Month Intrusion.
I found it particularly interesting that the threat actors used Latrodectus to drop a BackConnect RAT to the victim PC. I have verified that this RAT’s Command and Control (C2) traffic is using the exact same BackConnect C2 protocol as what would previously be seen in IcedID and QakBot infections.
This BackConnect RAT supports features such as:
- Reverse VNC (Keyhole)
- Reverse SOCKS
- Reverse shell (cmd.exe or powershell)
- File manager
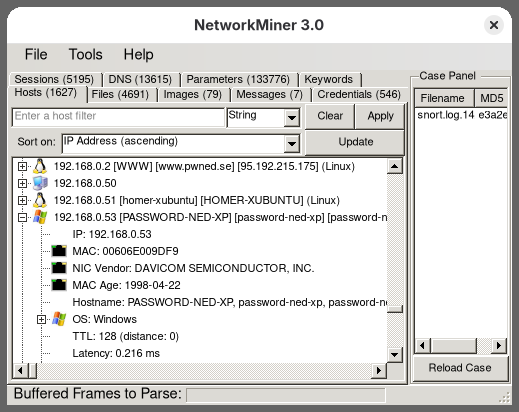
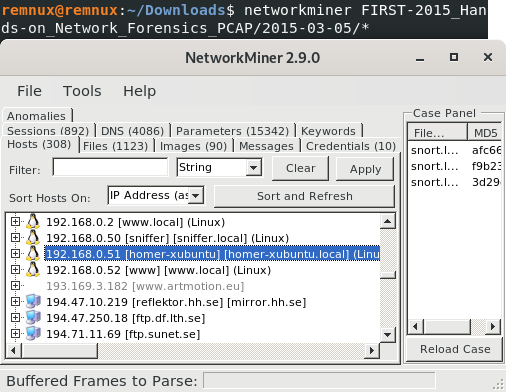
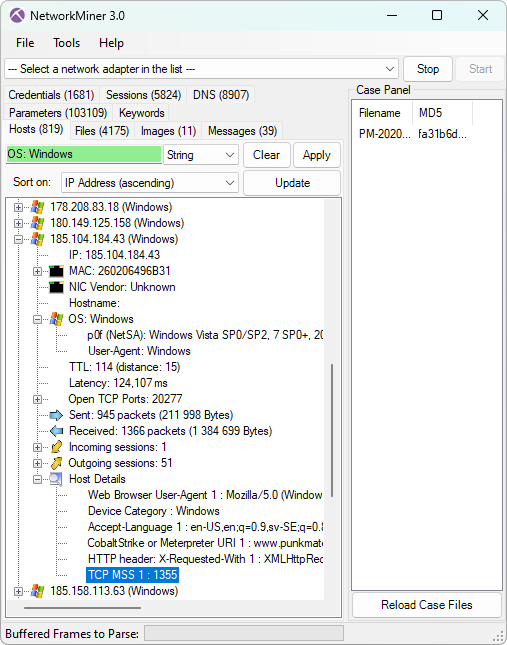
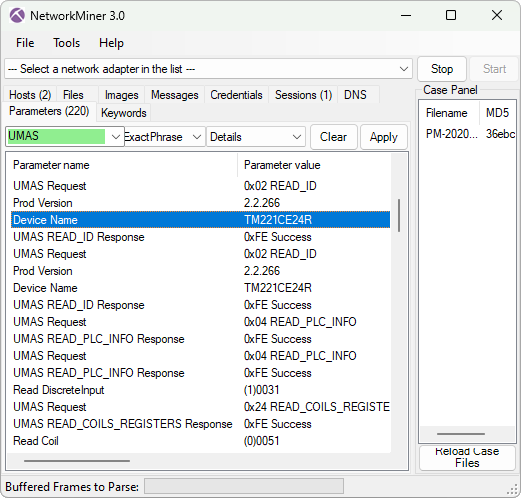
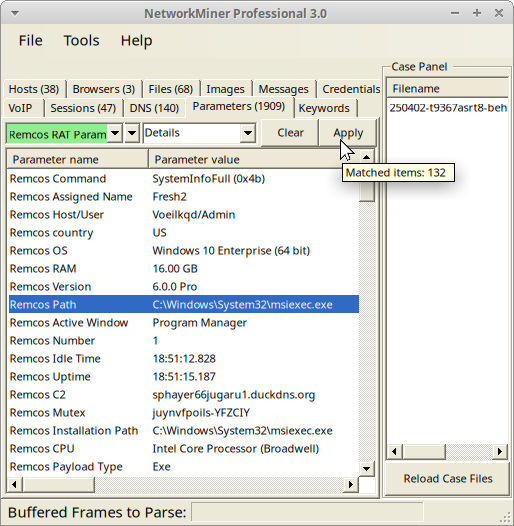
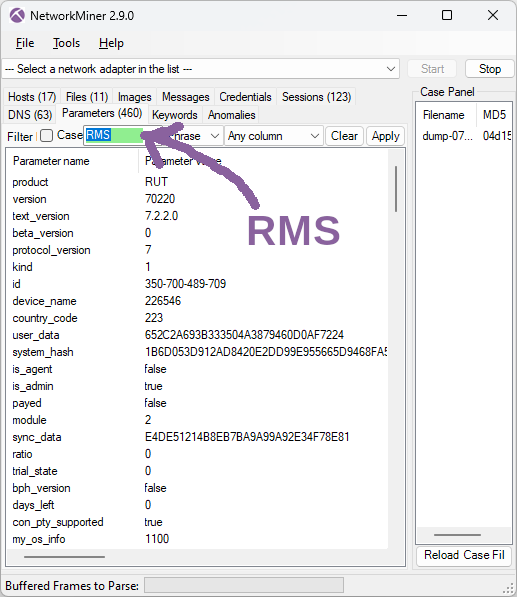
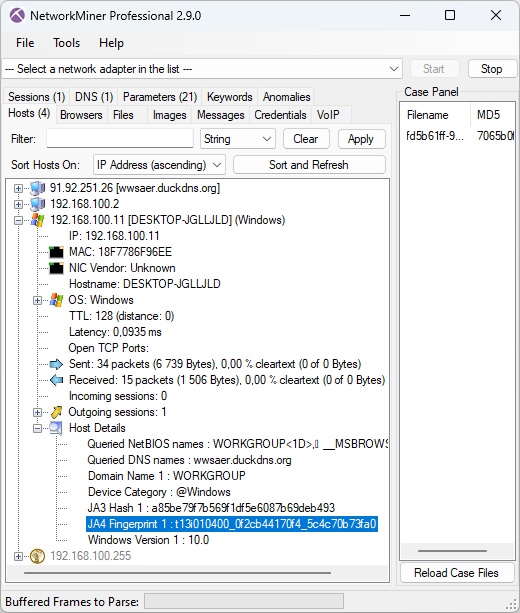
NetworkMiner
I immediately recognized the BackConnect protocol because I spent many hours reverse engineering that protocol back in 2022. I later spent even more time building a parser for it in 2023. This BackConnect parser was eventually published as part of the NetworkMiner 2.8.1 release.
I was happy to see that NetworkMiner could parse the BackConnect traffic in The DFIR Report’s Latrodectus case (#TB28761).

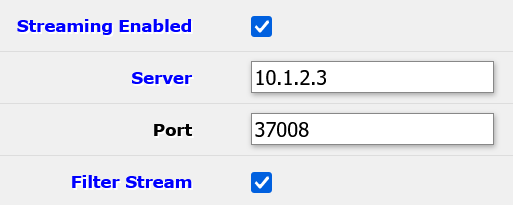
The only caveat was that I had to use NetworkMiner Professional, because it has a built-in protocol detection feature that detects the BackConnect traffic and applies the correct parser. That feature isn’t included in the free version of NetworkMiner, which is why it doesn’t know what to do with this strange looking TCP traffic to port 443.
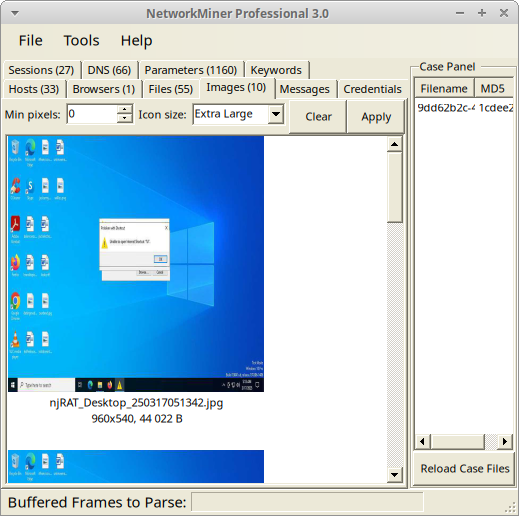
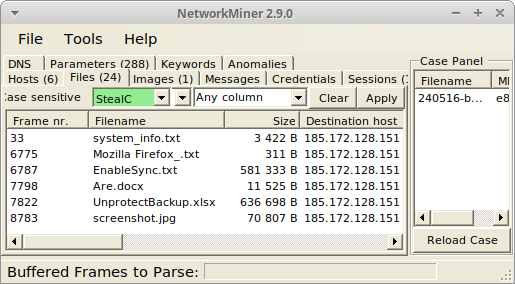
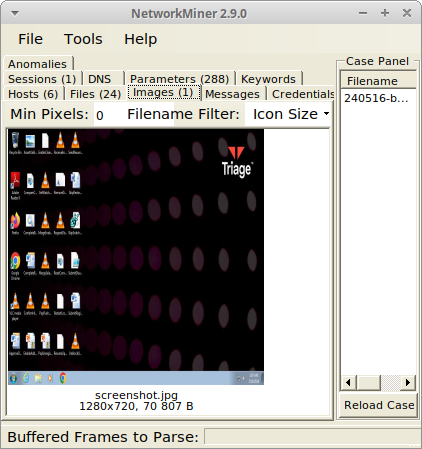
Below are some screenshots extracted with NetworkMiner Professional from the BackConnect reverse VNC traffic.

Image: Keyhole reverse VNC session

Image: Attacker fails to inspect ad_users.txt

Image: Attacker launches additional malware with rundll

The reverse VNC activity spanned a period of over two weeks, which is very impressive for this type of intrusion data set. The threat actors used the BackConnect reverse VNC service to access the machine several times during this period, for example to steal credentials and install additional malware.
A histogram of interactive BackConnect events, including reverse shell, VNC and file manager sessions, show that the majority of the work was carried out around 12pm UTC.

Keylog of the Attacker
Not only does the BackConnect network traffic from the intrusion allow us to extract screenshots from the VNC traffic. NetworkMiner also extracts the attacker’s hands-on keyboard activity.

The keylog shows that the attacker accidentally typed

This typo might seem a bit odd, but if you compare the US keyboard layout with the Russian Cyrillic one, then you’ll see that the dot key on the Cyrillic keyboard is at the same place as slash on the US keyboard.

Image: Russian Windows keyboard layout from Wikipedia
This reminds me of another BackConnect infection, captured by Brad Duncan, which he named IcedID (BokBot) infection with Keyhole VNC and Cobalt Strike. Here’s a screenshot that NetworkMiner extracted from the PCAP file shared by Brad:

The attacker can be seen typing “фьфящт” into the browser’s address bar in that VNC session. Фьфящт doesn’t mean anything in Russian, but the individual positions on the Russian keyboard corresponds to “amazon” on a standard Latin keyboard layout.
Reverse Shell
NetworkMiner also extracts commands from BackConnect reverse shell sessions.

This screenshot shows that the attacker sent the following command to the reverse shell:
This command launched a Cobalt Strike implant that connected to avtechupdate[.]com. Analysis of the Cobalt Strike C2 traffic is not in the scope for this blog post though, but the original writeup for this lab contains additional details on the Cobalt Strike infection.
The attacker later issued another rundll command to launch another red-team/penetration testing tool, namely Brute Ratel C4.
This Brute Ratel backdoor connected to C2 servers on erbolsan[.]com and a few other domains (see IOC list). The DFIR Report’s writeup contains additional information about that payload as well.
About The DFIR Report
The DFIR Report provide analysis of cyber intrusions, detailing the tactics, techniques, and procedures used by attackers. They share insights into various attacks, from initial access to execution, and offer private threat briefs and reports for organizations.
A lab containing Elastic or Splunk data from this infection can be purchased from The DFIR Report’s store. Look for the lab titled “The Lunar Tangled Malware Web - Public Case #28761”. The DFIR Report also sell access to a threat intelligence service, which contains even more detailed lab data from this and other malware infections.
Netresec is not affiliated with The DFIR Report.
IOC List
The analyzed infection is from 2024, so these indicators are in no way fresh. They are included here for research purposes and to facilitate retro hunting.
BackConnect C2 ip:port
- 185.93.221.12:443
- 193.168.143.196:443
Latrodectus domains
- grasmetral[.]com
- illoskanawer[.]com
- jarkaairbo[.]com
- scupolasta[.]store
- workspacin[.]cloud
Cobalt Strike C2 URI
- hxxps://resources.avtechupdate[.]com/samlss/vm.ico
Brute Ratel C4 domains
- dauled[.]com
- erbolsan[.]com
- kasym500[.]com
- kasymdev[.]com
- samderat200[.]com
Network Forensics Training
Check out our network forensics training if you want to learn more about analyzing malware traffic in PCAP files.
I will teach an online class for incident responders and blue teams on February 23-26. That class allows a maximum of 15 attendees in order to provide a good environment for taking questions. So don’t miss out on this chance to get your hands dirty with some packet analysis together with me!
Posted by Erik Hjelmvik on Wednesday, 10 December 2025 13:00:00 (UTC/GMT)
Tags: #BackConnect #IcedID #VNC #Keyhole #NetworkMiner


